From breakfast to dinner, from wholesome meals to indulgent desserts, Nexa Recipes offers quick, easy, and delicious ideas for every occasion and every moment.
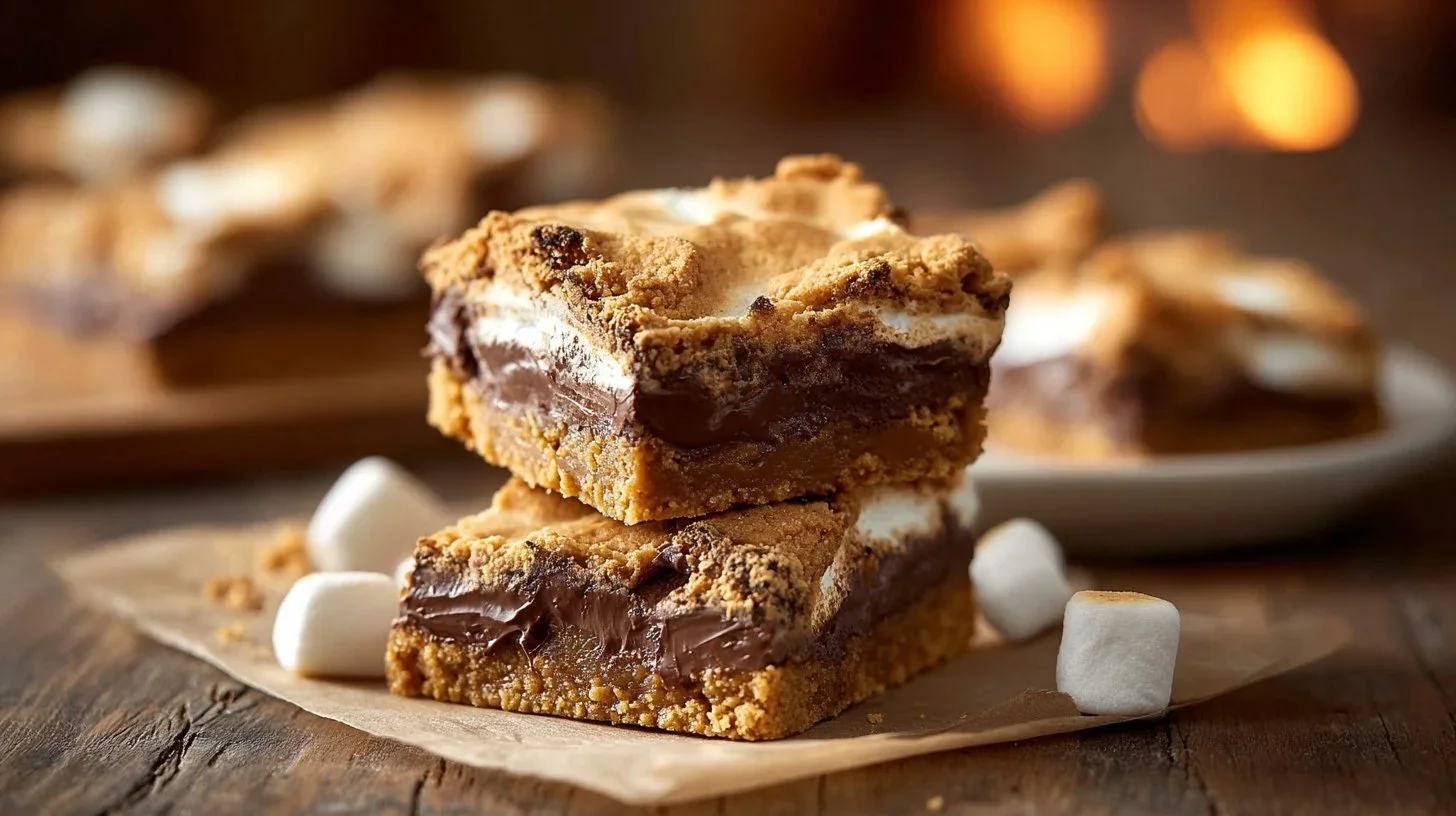
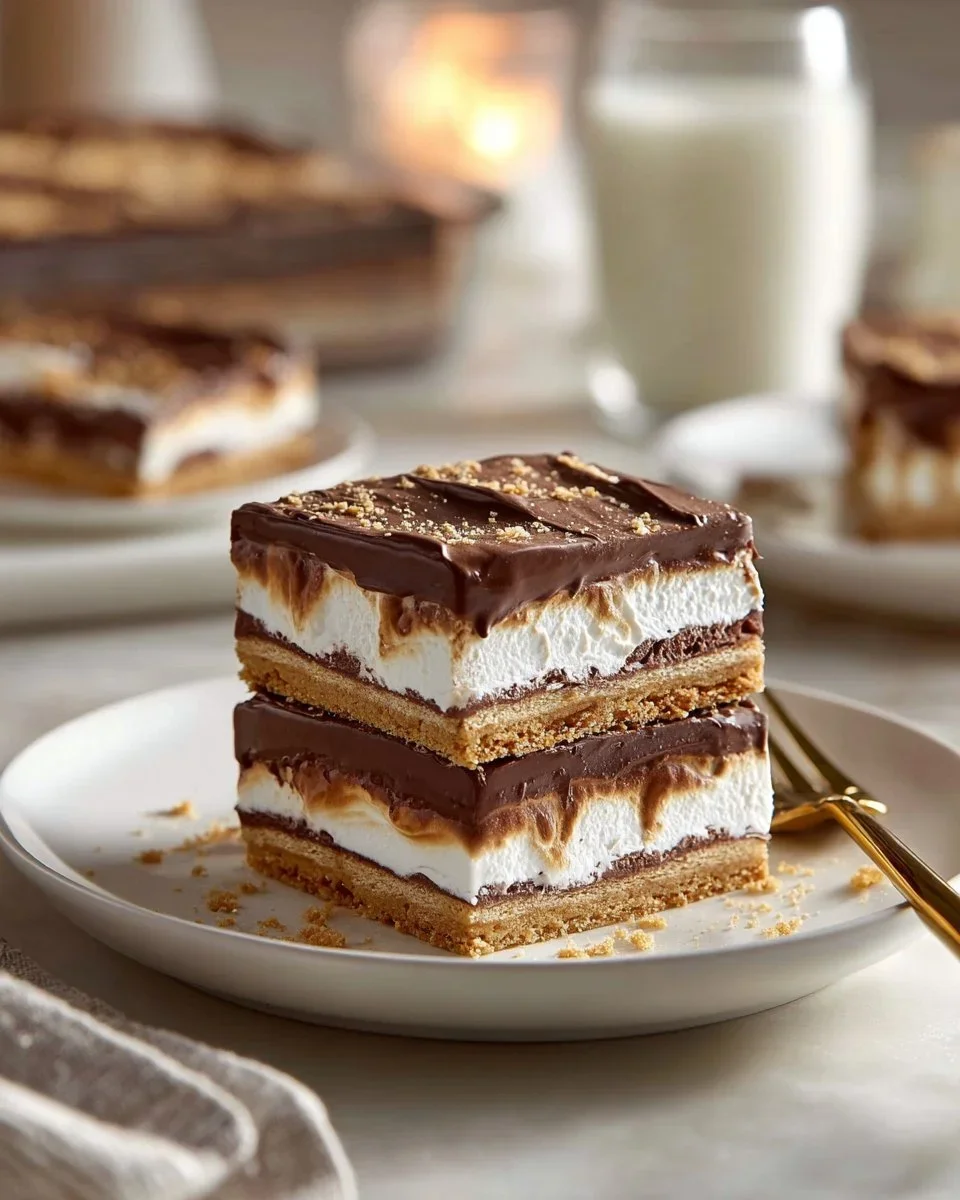
Peanut Butter S’mores are an easy, crowd-pleasing treat that combine toasted marshmallow, melting chocolate, and peanut butter in an oven-baked bar. You get a crisp graham-like base, a gooey marshmallow center, and a peanut butter drizzle in every slice.
People search for this recipe when they want a portable s’mores-style dessert that doesn’t require a campfire. It solves the need for a make-ahead party dessert or an easy baking project when you want s’mores flavor without fuss.
Why Make This Recipe
This recipe is straightforward and uses familiar pantry ingredients you likely have on hand. Butter, sugar, flour, and crushed graham crackers form a sturdy, cookie-like crust that holds the layers.
The assembly is simple and quick: press dough, add chocolate, drizzle peanut butter, spread marshmallow cream, and top with remaining dough. Bake time is under an hour, and cooling makes slicing clean and tidy.
These bars work for casual gatherings, school potlucks, or an after-dinner treat. You can make them the day before and bring them to events without losing texture.
How to Make Peanut Butter S’mores Bars
The preparation approach is a layered bake so each component keeps its texture. The dough contains both flour and graham cracker crumbs to create a crunchy, slightly sandy base that browns in the oven.
The bars rely on melting the chocolate in place and spreading marshmallow cream over it so you get uniform pockets of goo without having to toast marshmallows. Drizzling warm peanut butter distributes flavor without flattening the marshmallow layer.
Ingredients
- 1/2 cup butter, softened
- 1/4 cup packed brown sugar
- 1/2 cup sugar
- 1 egg
- 1 teaspoon vanilla
- 1 1/4 cups flour
- 1 teaspoon baking powder
- 1/4 teaspoon salt
- 6 graham crackers, crushed into fine crumbs
- 2 Giant Hershey’s milk chocolate bars, 7 ounces each
- 1 jar marshmallow cream, 7 ounces
- 1/2 cup peanut butter
Directions
- Preheat the oven to 350 degrees.
- Line a square baking dish with parchment paper.
- Beat the butter and sugars until fluffy. Add the egg and vanilla and mix well.
- Add the flour, baking powder, and salt and stir to combine.
- Stir in the graham cracker crumbs. Press 2/3 of the dough into the bottom of the baking dish. Press the chocolate bars on top of the dough.
- Melt the peanut butter for about 30 seconds in the microwave and drizzle it over the chocolate bars. Spread the marshmallow cream over the chocolate and peanut butter.
- Roll the remaining 1/3 dough onto a nonstick surface and peel it off to press it on top of the marshmallow cream.
- Bake for 30 minutes or until golden brown on top. Let cool for best serving results.
How to Serve Peanut Butter S’mores Bars
Serve the bars at room temperature for the best texture and clean slices. Cut into squares with a sharp knife, wiping the blade between cuts if the marshmallow is still soft.
Pair them with cold milk, iced coffee, or a simple fruit platter to balance the richness. A small drizzle of warmed peanut butter or a sprinkle of crushed graham crackers on top adds a tidy finishing touch.
For parties, serve on parchment-lined trays so guests can grab a square without making a mess.
How to Store Peanut Butter S’mores Bars
Store cooled bars in an airtight container at room temperature for up to 2 days. If your kitchen is warm, refrigerate and bring to room temperature before serving; refrigeration extends life to 4–5 days.
For longer storage, freeze individual squares between parchment sheets in a sealed freezer bag for up to 2 months. Thaw in the refrigerator overnight and bring to room temperature before serving to restore texture.
Avoid prolonged exposure to heat to prevent the marshmallow layer from becoming too gooey.
Tips to Make Peanut Butter S’mores Bars
Start by softening butter to room temperature so it creams smoothly with the sugars.
Measure flour properly by spooning into the cup and leveling to avoid a dense crust.
Crush the graham crackers finely so they blend into the dough and provide even texture.
When pressing the dough, use lightly oiled hands or a flat-bottomed cup for an even base.
Warm peanut butter slightly to create a thin peanut butter drizzle that spreads over the chocolate.
Press the chocolate bars gently into the dough so they nest without breaking the base.
Cool completely before slicing for neat edges and cleaner serving squares.
If marshmallow cream is stiff, microwave it for a few seconds to make spreading easier.
Common Mistakes to Avoid
A common error is using cold butter, which prevents proper creaming and yields a dense bottom crust. Let butter soften until it gives slightly when pressed.
Another mistake is cutting the bars too soon. The marshmallow layer needs time to set; slicing while hot causes smears and sticky serving pieces. Cool fully for best results.
Variations
Swap the Giant Hershey’s milk chocolate bars for dark chocolate or chocolate chunks for a more intense cocoa flavor. You can also replace peanut butter with almond butter for a different nut profile.
For a nut-free version, skip the peanut butter and add a thin layer of cookie butter or extra chocolate instead.
FAQs
Can I use regular Hershey bars instead of Giant Hershey’s milk chocolate bars?
Yes, regular Hershey bars work fine; just arrange pieces to cover the surface evenly.
Is marshmallow cream the same as marshmallow fluff?
Yes. Marshmallow cream and marshmallow fluff are interchangeable in this recipe.
Can I make the dough ahead of time?
You can refrigerate the dough for up to 24 hours wrapped in plastic, then press and assemble before baking.
Will the marshmallow cream sink into the chocolate?
If you spread the marshmallow cream evenly over slightly warm chocolate, it will sit on top rather than sink.
Can I halve the recipe for a smaller pan?
Yes, adjust baking time and use a smaller square pan; check for a golden top and set center.
How do I prevent the top dough from browning too fast?
If the top browns early, tent loosely with foil during the last 10 minutes of baking.
Conclusion
Peanut Butter S’mores Bars are a practical way to get classic s’mores flavor without a campfire, with a crisp graham-style base and a gooey chocolate-marshmallow middle. If you want another no-fuss bar that’s easy to slice and share, try these Golden Grahams S’mores Bars next. For a reliable reference on storing baked treats safely (room temp vs. fridge), the Cold Food Storage Charts from FoodSafety.gov are a helpful guide.